
There are a lot of health benefits to eating yogurt…but if I’m honest, I just eat it cuz I like it. My favorite way to eat it is in the morning as a milk substitute with my cereal (call me weird but I don’t like how milk splashes if cereal falls off the spoon) with a little honey. But store-bought yogurt can be expensive (especially if you eat as much as I like to now that I’m no longer going 100% dairy-free) and I like to keep a pretty low food budget. I will buy the Yoplait for my hubby to pack to work because it’s in serving sizes, etc., but for myself I make a whopping batch of plain yogurt.
It’s not that hard though I started with fear and trepidation. If I can do it and not mess it up too badly, you can too! Lately Aldi (blessed store I shall miss incredibly…) has had gallons of milk for $1.89! I use a half gallon to make a batch of yogurt so that’s a lot of yogurt for under a dollar! A couple months ago I bought some plain greek yogurt on sale and used that as the starter (the live cultures in it “inoculate” the cooked milk and grow more yogurt cultures), then with every batch I just reserve 1/3 cup as my next batch’s starter. You can freeze it if need be and then thaw for use next time if you won’t be making yogurt again soon.
Amy’s Stovetop and Oven Yogurt Routine
(I start in the evening so it sits overnight).
1. Prepare supplies: 1/3 c. plain yogurt, whole milk, plastic wrap, candy thermometer, big pot, metal whisk, glass jars big enough for the amount of milk I’m cooking, a cookie sheet with a towel on top for wrapping in the oven to keep warm, sink filled with ice water.
- Heat your oven to 250 degrees, then turn it off. Turn the oven light on to maintain heat.

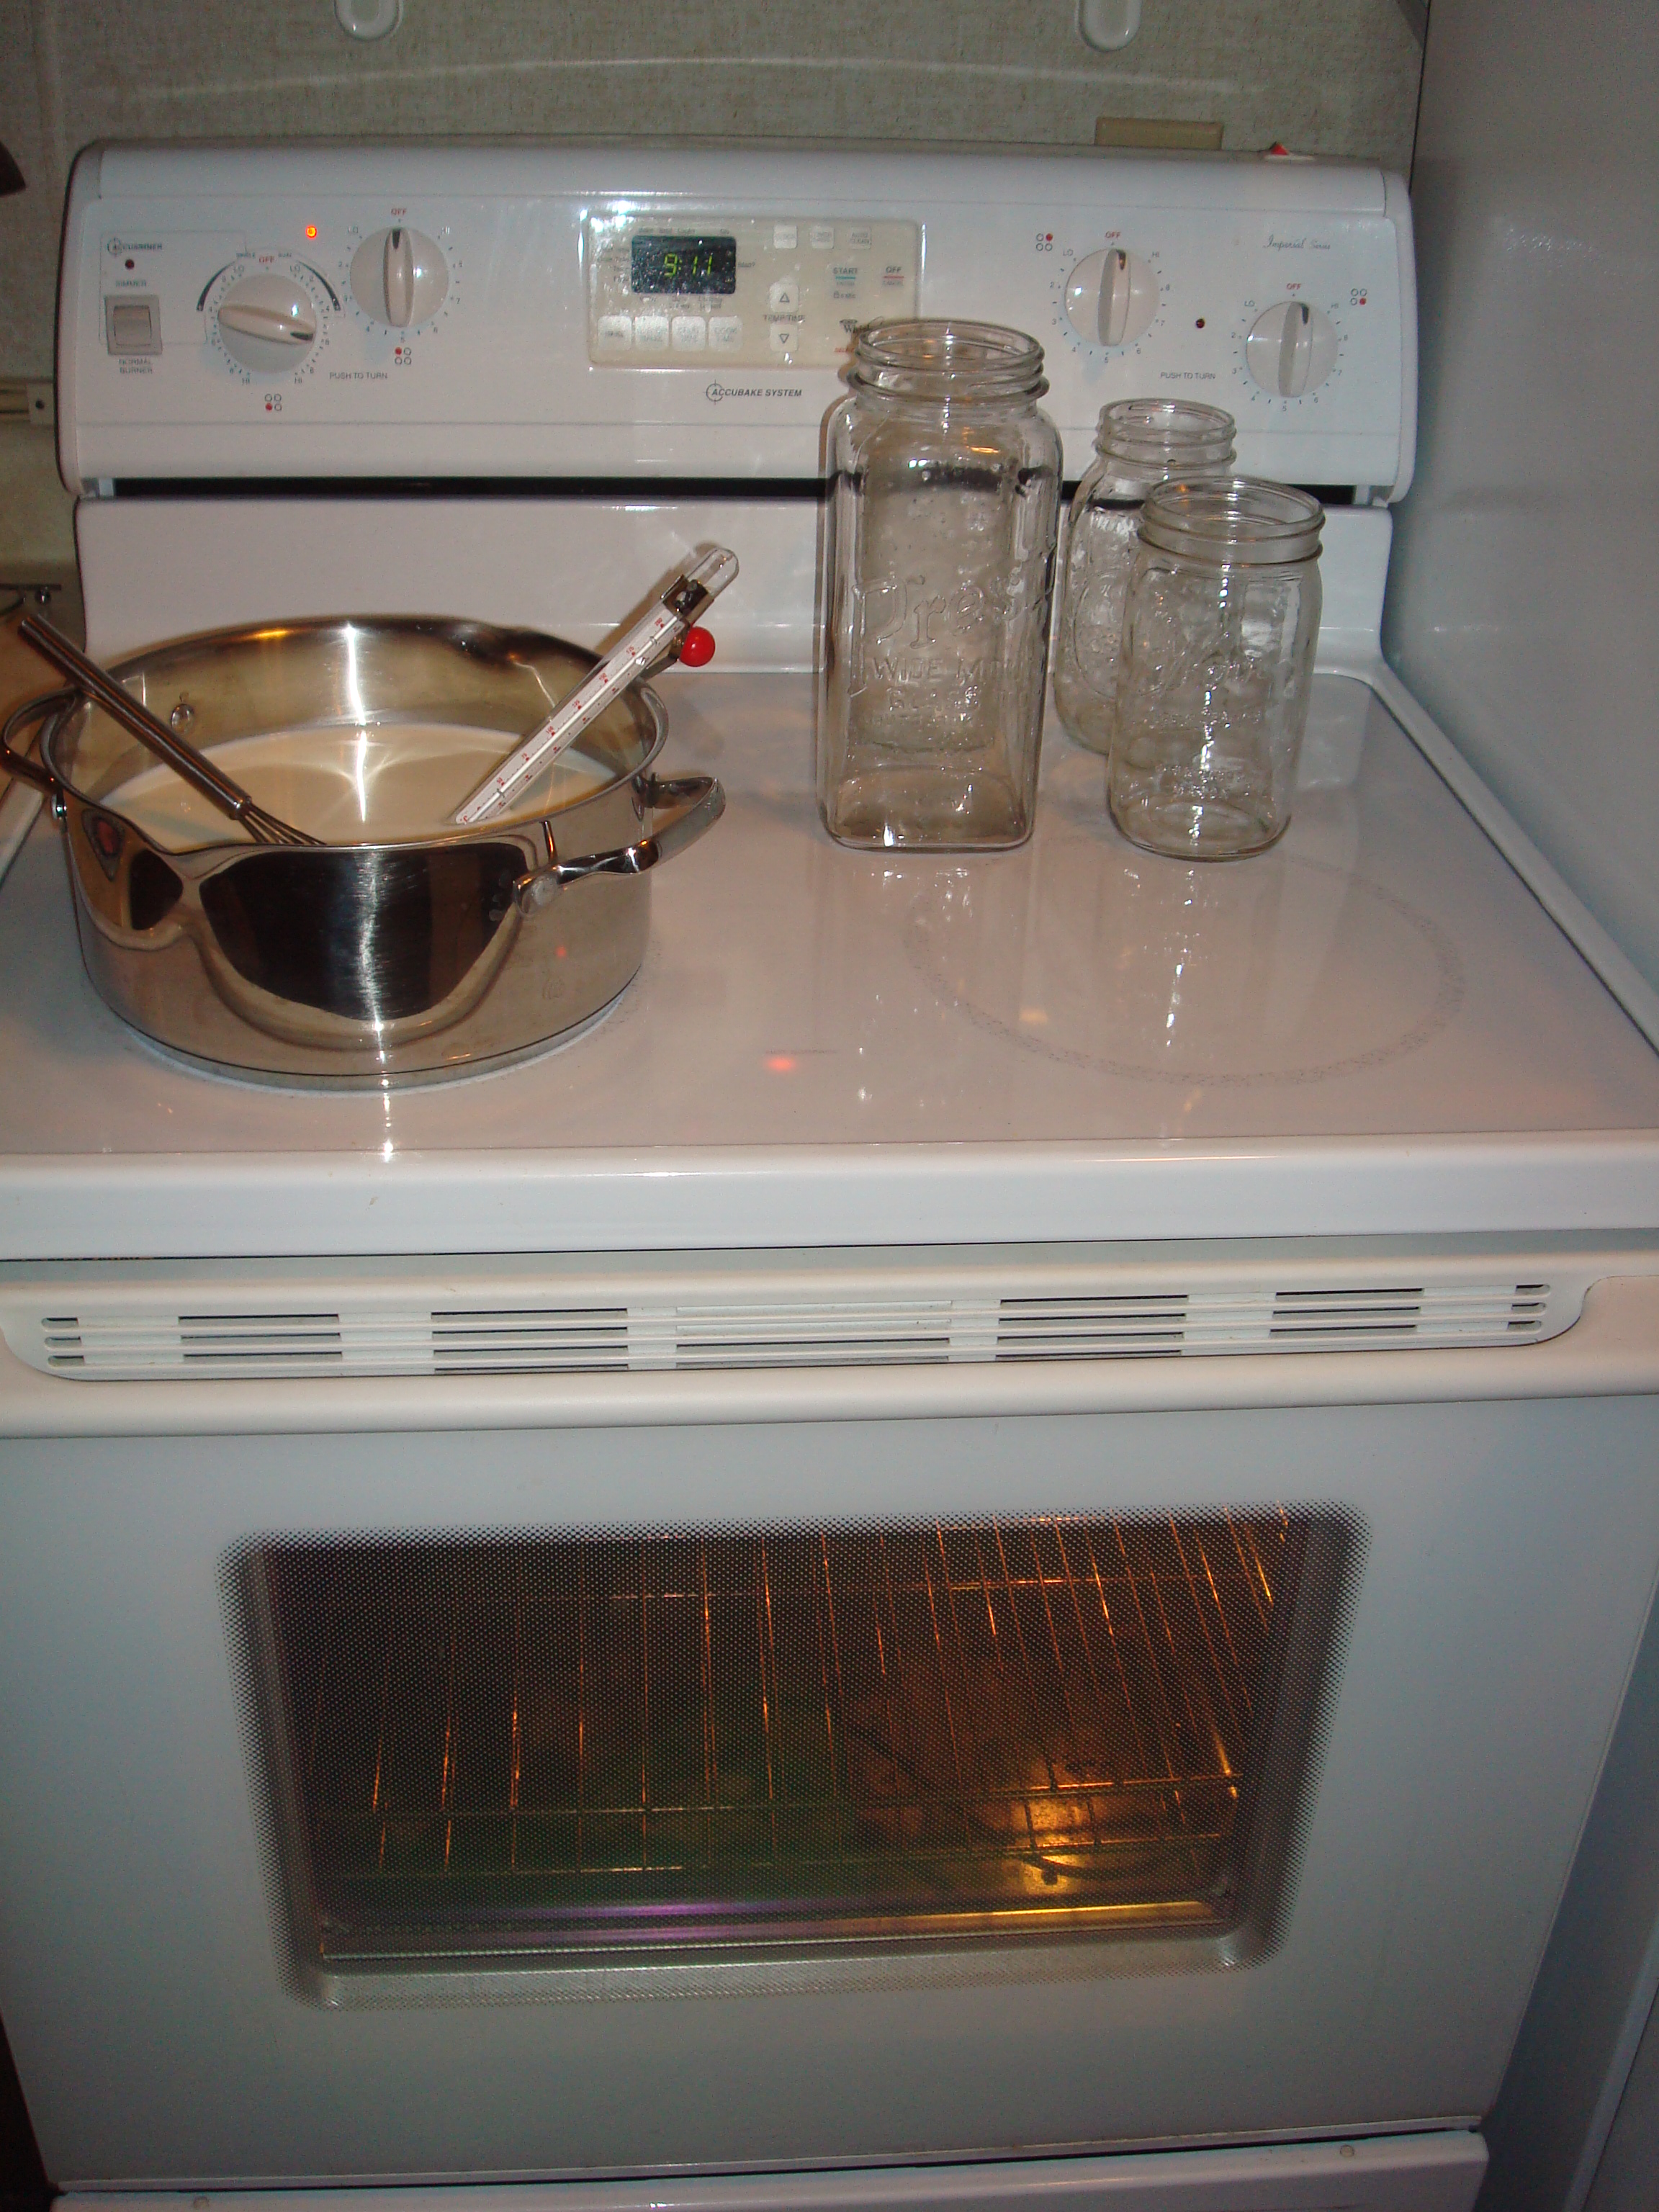
2. On medium, cook milk (stirring occasionally) until it reaches 180-185 degrees. This takes about 15 minutes?
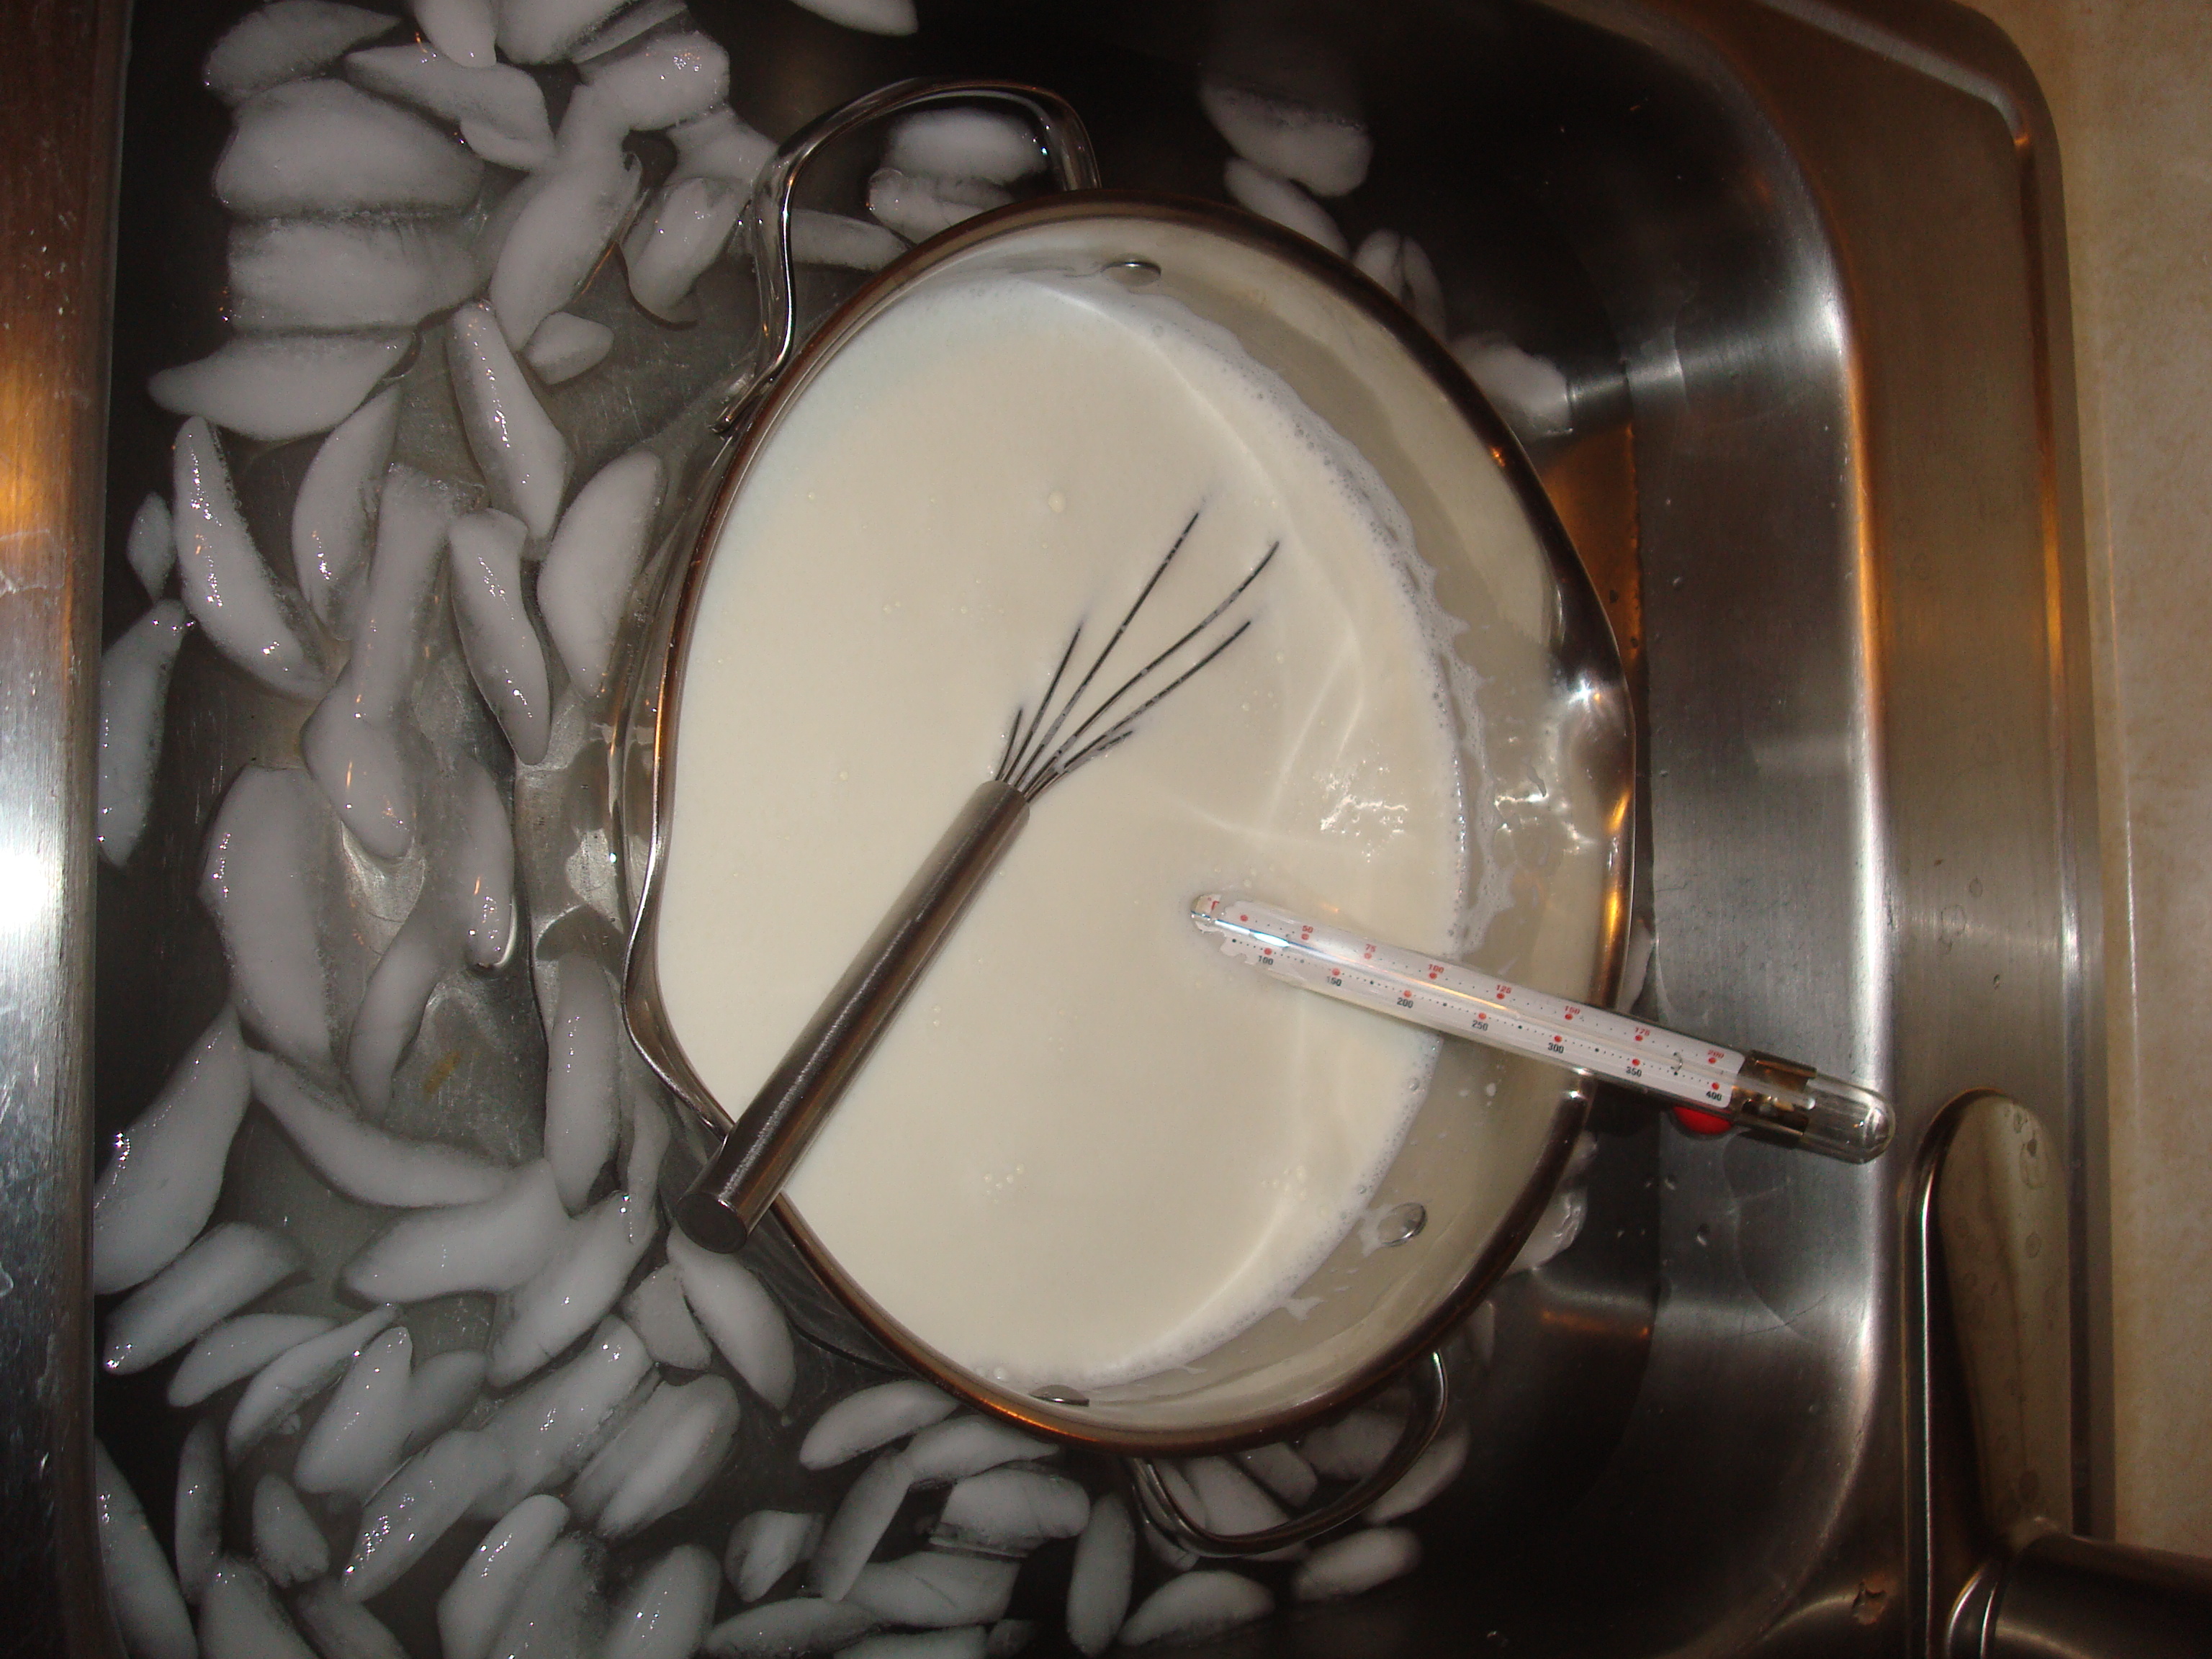
3. Cool the milk quickly down to 115 degrees by floating the pan in the sink filled with ice water. This takes a few minutes and you’ll want to stir occasionally and watch it, ready to pull it out before it goes below that temperature.
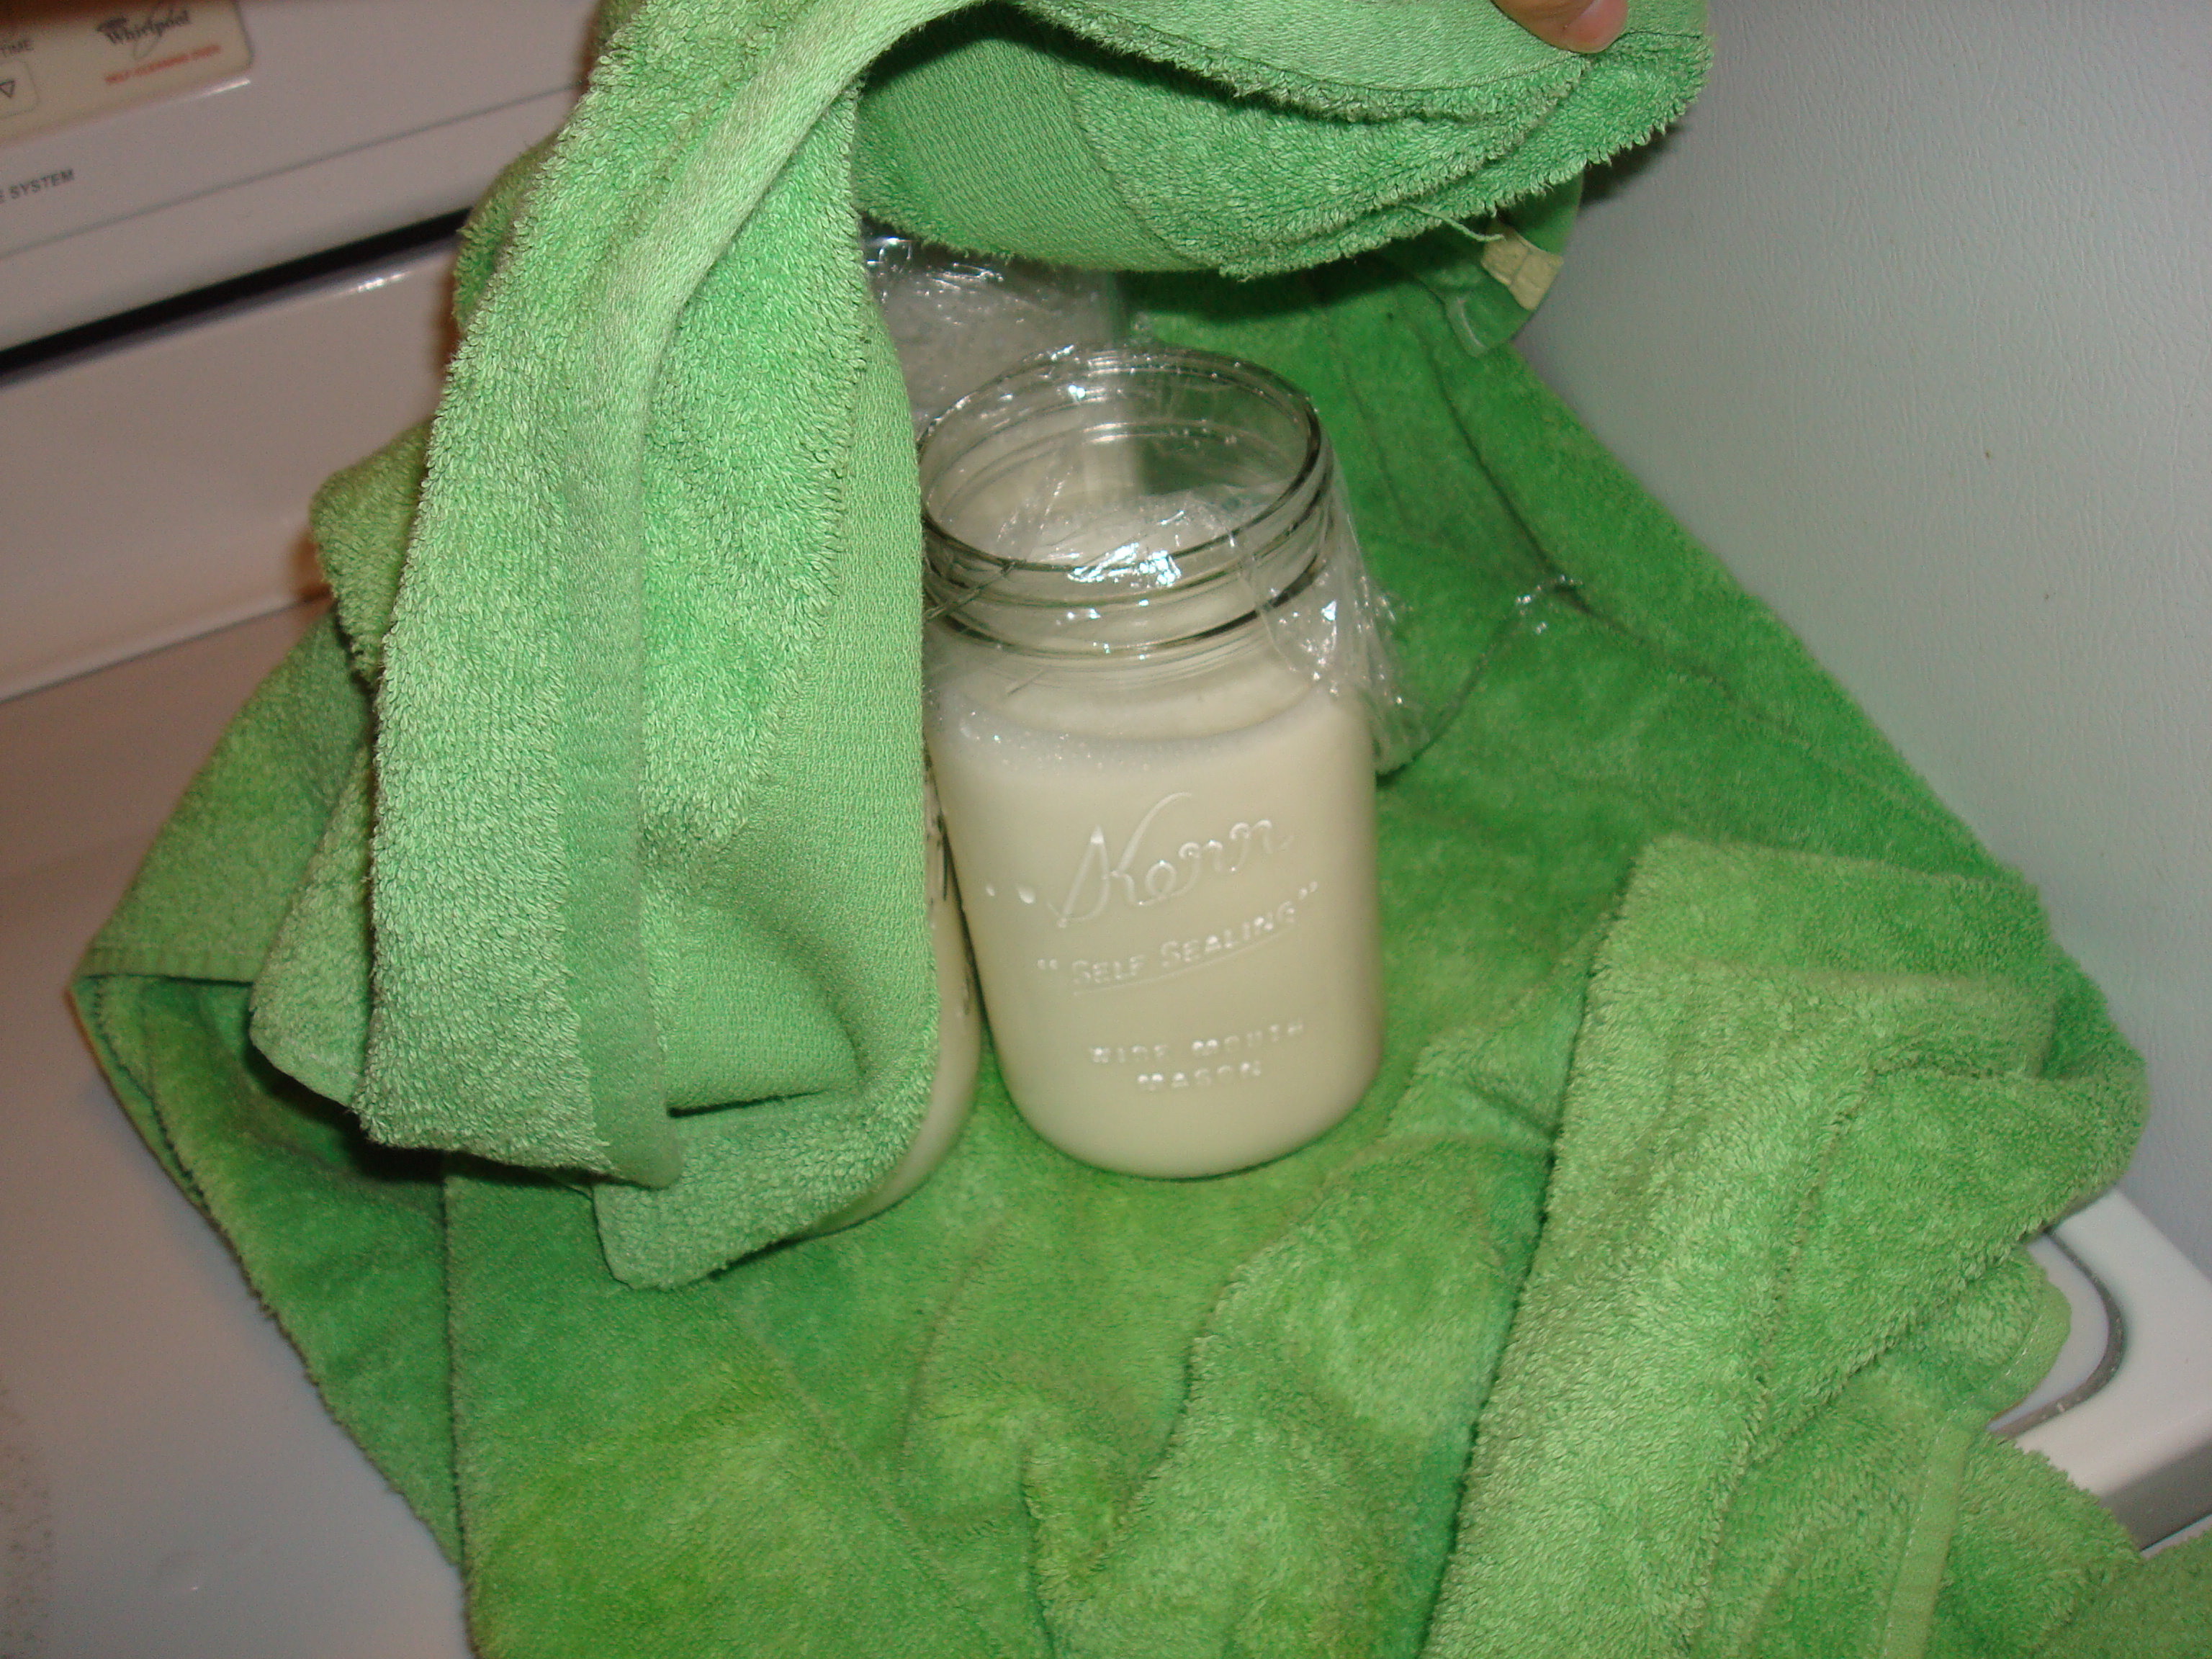
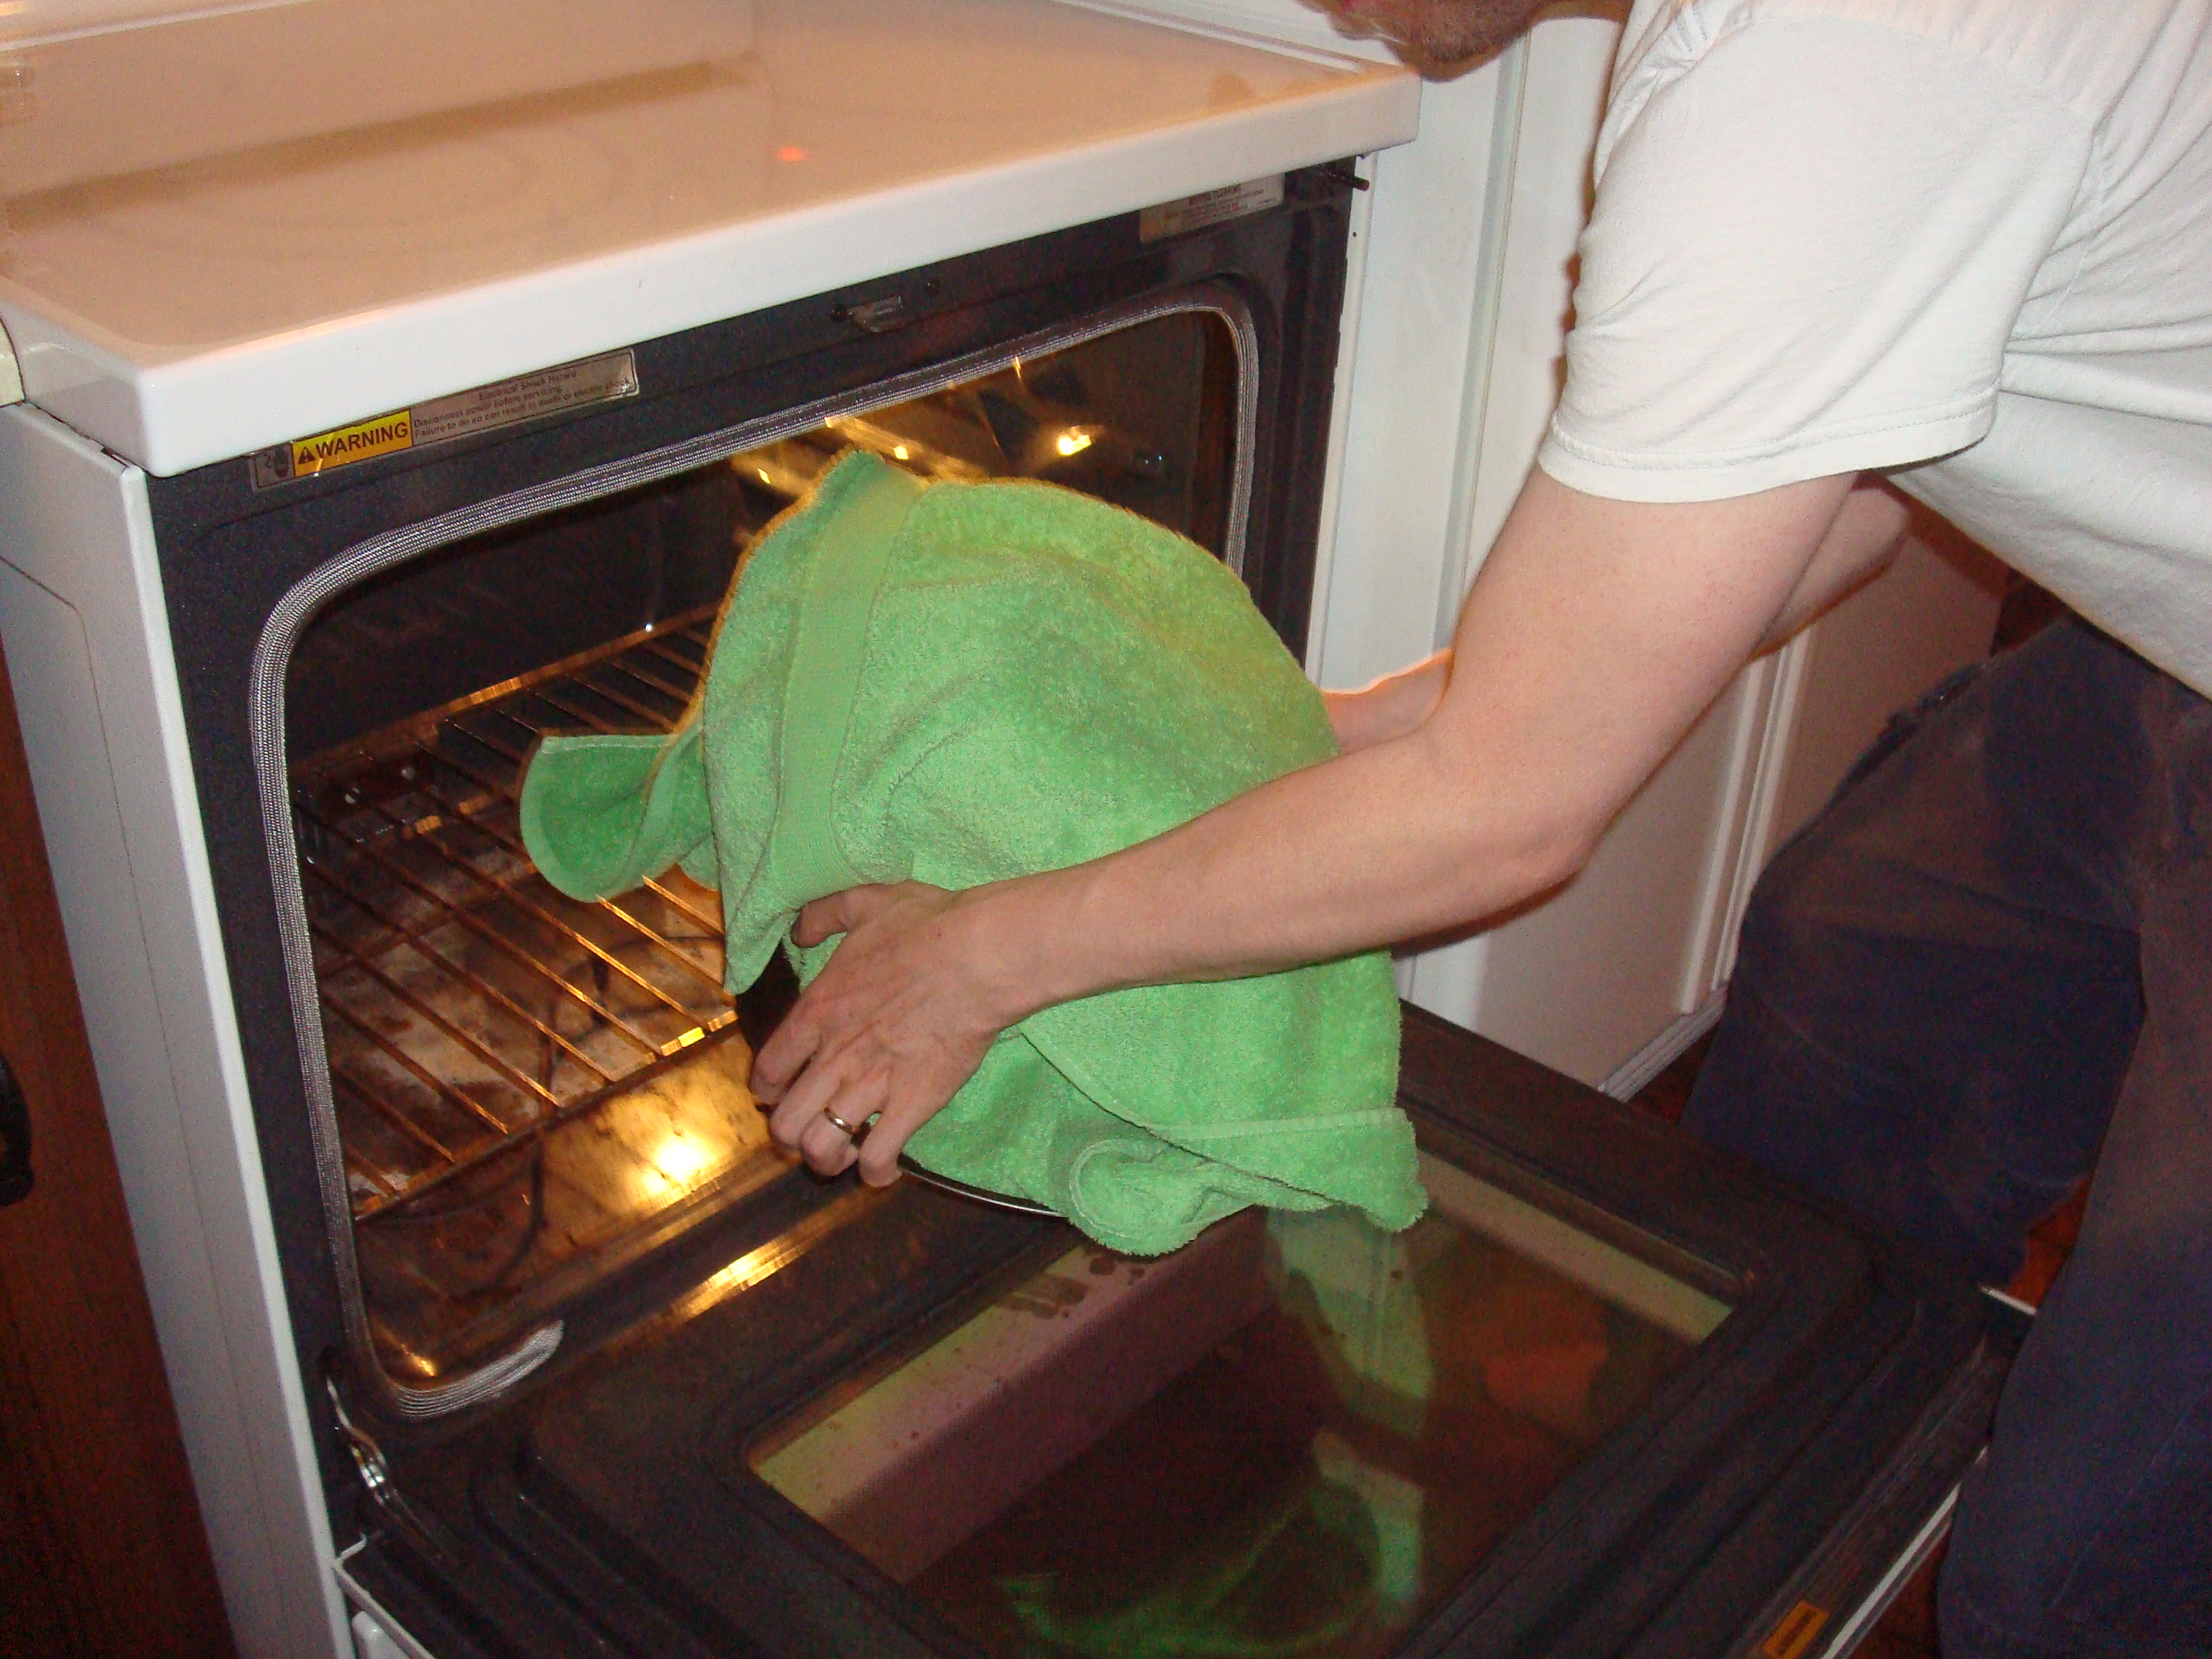
4. Whisk in the yogurt starter, then pour inoculated milk into the jars. Cover the mouths of the jars with plastic wrap and then set them on the towel-covered cookie sheet, wrap them up, then set the pan into the pre-warmed oven with the light on. Leave there minimum of 6 hrs…18 max, then refrigerate. Longer time=more tartness.

(I tend to leave mine in longer so it’s more like Greek yogurt thickness, and I use it as a sour cream substitute, too). If it appears runnier than you’d like, wait a few hrs after it has been in the fridge to peek again, and it should have thickened. Mine always comes out smooth and not chunky with this method, and I don’t have to strain off the whey to make it thicker. Not sure if using the Vitamin D milk has anything to do with the outcome.

Thanks for sharing, it is so interesting to see the steps here! I’ve nominated you for a Liebster Award (if you choose to accept). Here is the link to what that is! http://krumkaker.wordpress.com/2013/06/23/liebster-awards/
I know not all bloggers like awards, so if that’s you: please do not feel obliged in any way to do anything about being nominated – just enjoy the appreciation.